
3.23 Write Data Component
The Write Data component looks like this in the left-hand panel of widgets when a dashboard is in edit mode.
Write Data Button Configuration
Section titled “Write Data Button Configuration”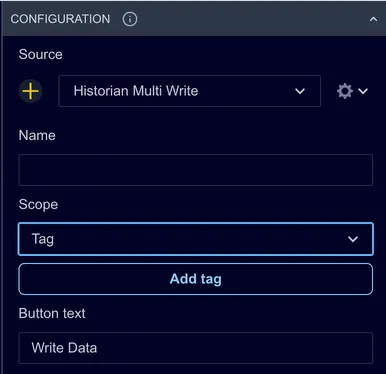
Source: By default, this is set to the Historian Multi Write data source. It is unlikely that this would need to be changed as this data source supports all configured writeable historians in the Ingenuity 7 subscription.
Name: This field is not used but may be useful if there are more than one Write Data buttons on a page
Scope: this determines where the button looks for the list of tags to write to. The options are:
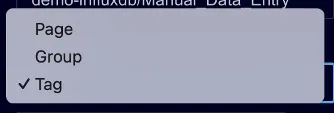
Tag: the list of tags is configured in the Configuration of the button
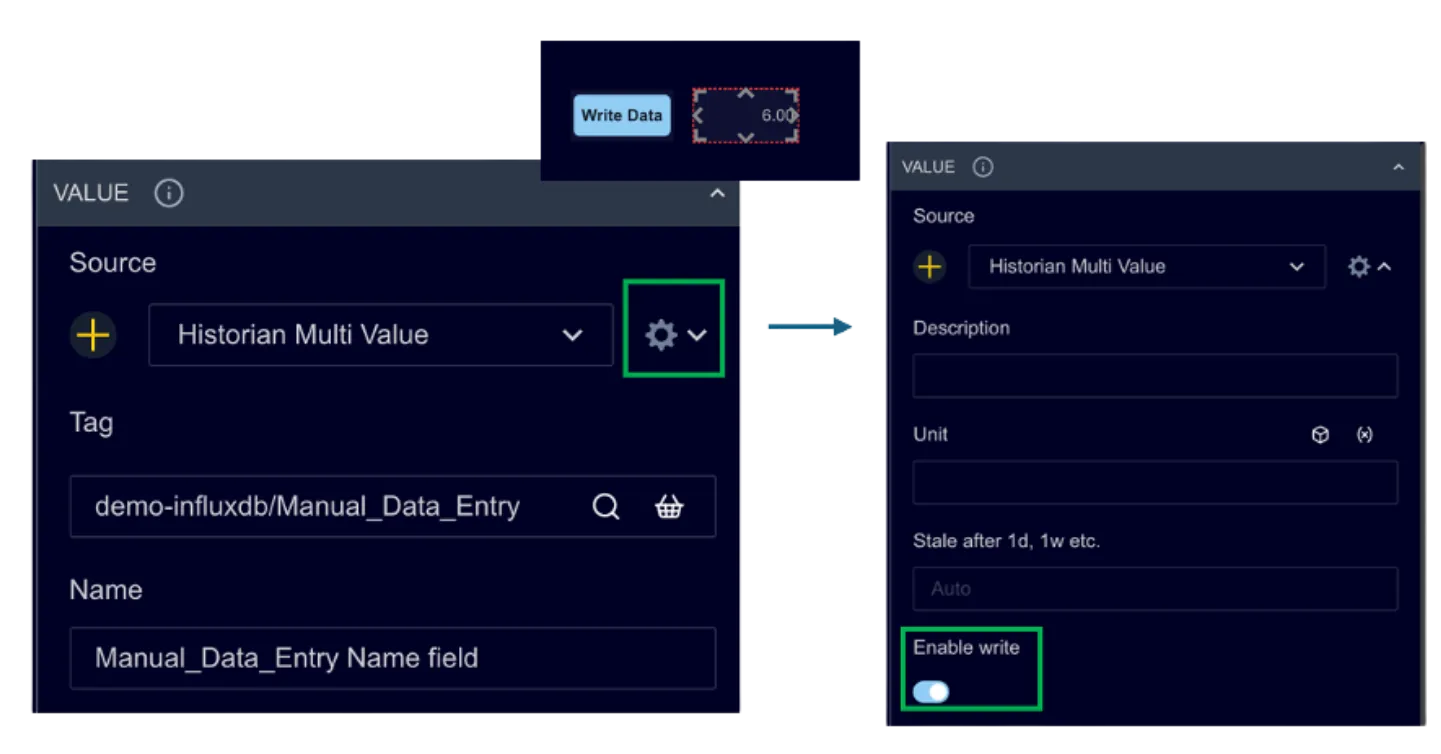
Page: the list of tags comes from the tags on the page that are flagged with “Enable write”
Group: the list of tags comes from the tags in the same group as the Write Data button that are flagged with “Enable write”
Write Data Button Scope
Section titled “Write Data Button Scope”Scope = Tag
The list of tags is set directly in the Configuration section as shown in the screenshot below
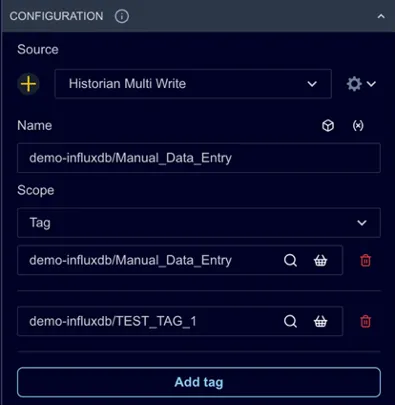
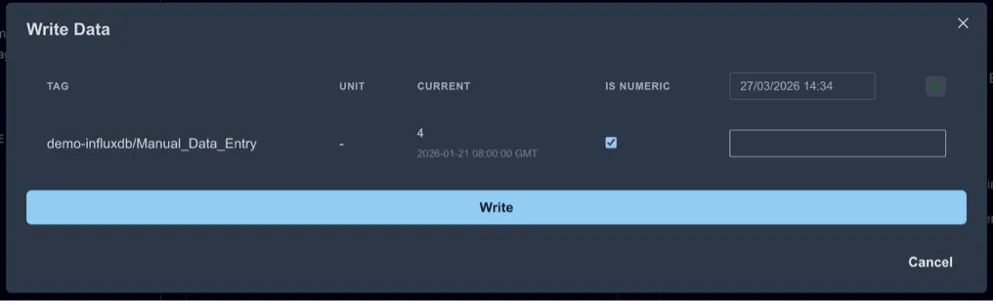
Multiple tags can be configured by clicking Add tag. The full tag will be displayed in the form that pops up to write data.
Scope = Page
The list of tags comes from the page. The code looks for any historian tag on the page that has been flagged to “Enable write”. For example, the Write Data button in the screenshot below will pick up the tag in the Number component to the right if “Enable write” is set to true under the Settings (cog wheel icon) in the Source configuration
Scope = Group
The list of tags comes from the Group that the Write Data button belongs to. This works the same way as the Page scope above, but the button only looks at tags in the same group on the dashboard. If the button is not part of a group, it will not pick up any writeable tags.
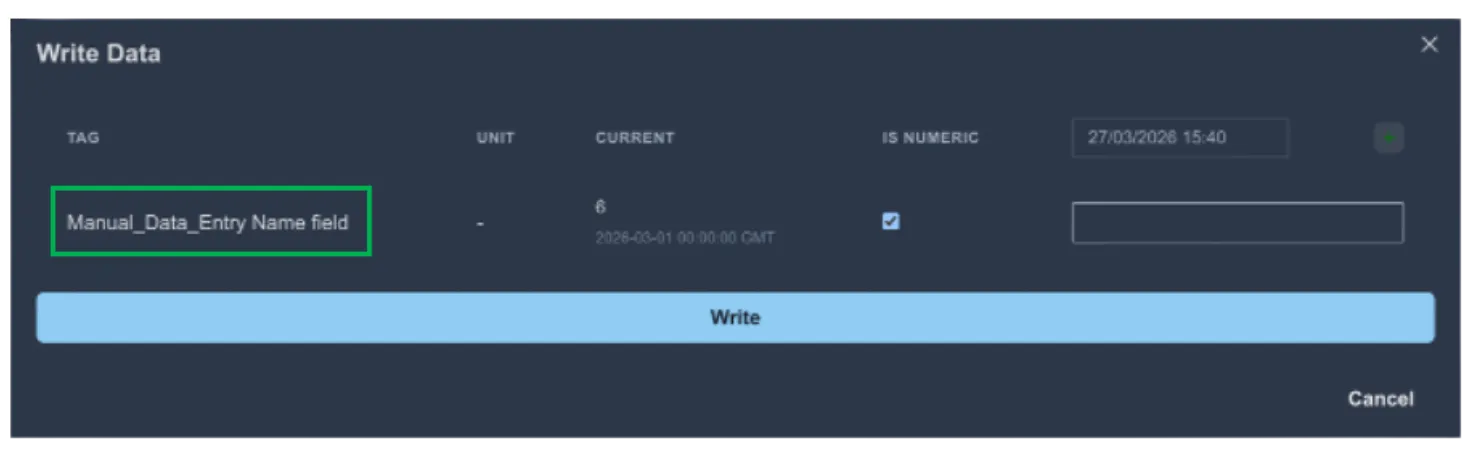
This can be useful for users when the tag name might be complex or not intuitive. Using a more user-friendly name can make it easier for users to enter the correct data.
Other Configuration Options
Section titled “Other Configuration Options”The other configuration options determine the button’s appearance on a dashboard and the default settings for the popup form.
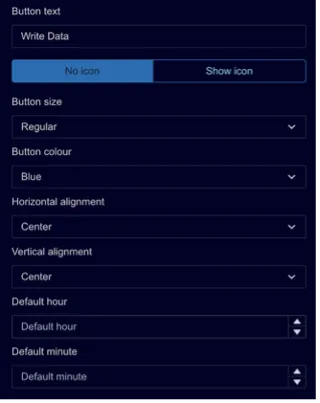
Button Text: The text to show on the button. By default, it is set to “Write data”.
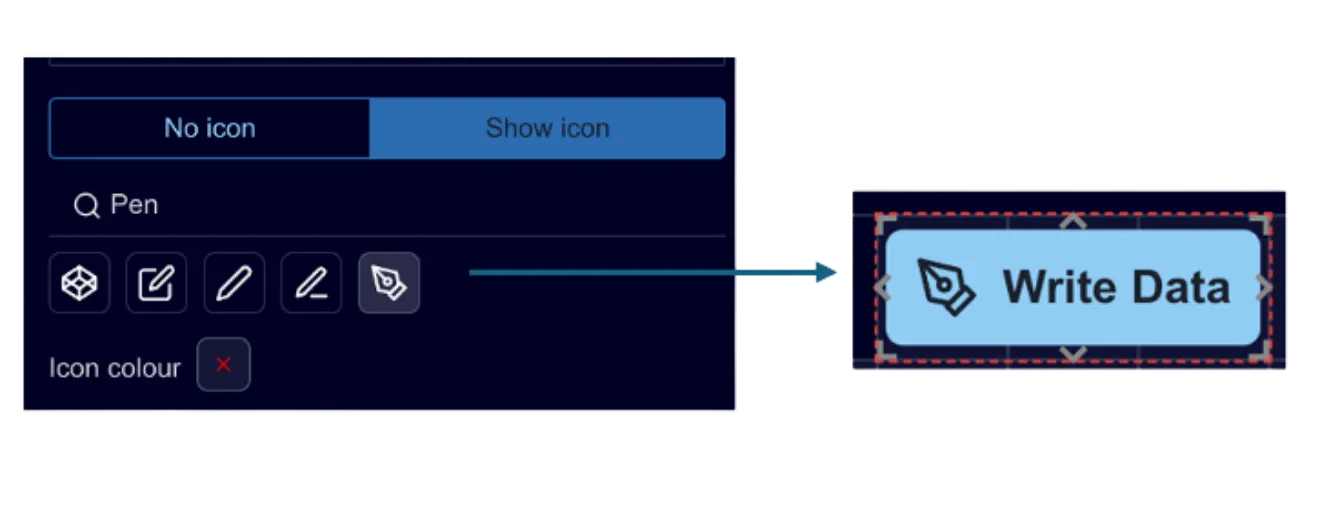
No icon/Show icon: set this to “Show icon” if you would like to add an icon to the button. A search box appears. Type in words that describe the kind of icon you would like and select from the available options as shown below .
Button size: Select from pre-defined sizes:
- Extra Small
- Small
- Regular
- Large
Button colour: select from pre-defined button colours.
Horizontal alignment: this determines where the button sits horizontally within its frame as the page scales. It gives flexibility to make sure the button is always positioned as desired on wider screens.
Vertical alignment: this determines where the button sits horizontally within it’s frame as the page scales. It gives flexibility to make sure the button is always positioned as desired on larger screens.
Default hour: this is used to set the default hour of the timestamp to write data for. Setting it to ‘0’ will set the hour to midnight.
Default minute: this sets the default minutes after the hour.
Background Configuration
Section titled “Background Configuration”The Background configuration is that same as any other dashboard component and gives users very granular control on the padding, corner rounding, shadow and borders.
Type Configuration
Section titled “Type Configuration”Not used.
Using the Write Data Widget
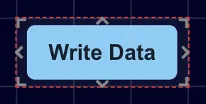
Section titled “Using the Write Data Widget”Drag and drop it onto a page and it shows as a blue button with the text Write Data.
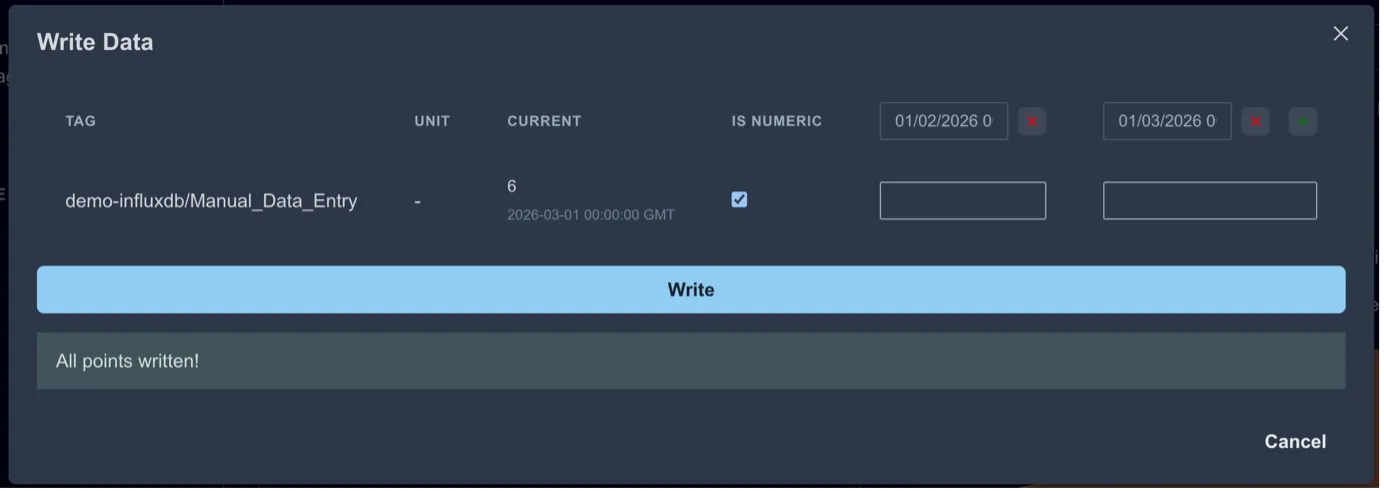
When the button is clicked, a form pops up for the user to enter the data to write.
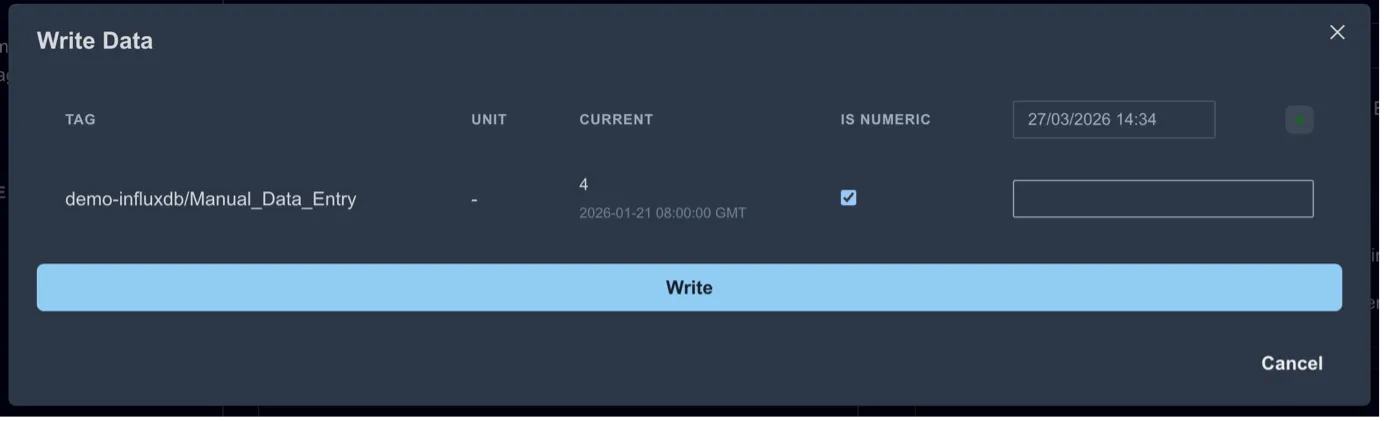
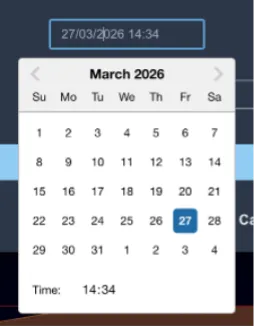
The timestamp can also be adjusted.
Multiple values can be written by clicking the [+] icon at the right-hand side
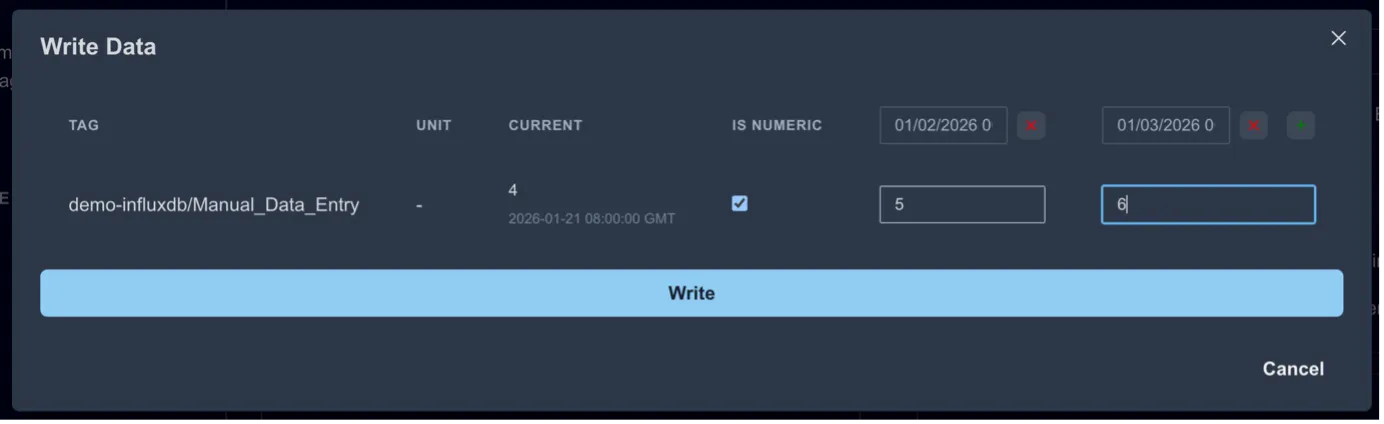
Click “Write” to write the points to the data source(s).